Tuesday, December 31, 2013

1025- H.Stab- p.8-2 step 5-6 & p.8-3 step 1-2

Horizontal Stabilizer - 1 hrs 50 mins (H.S. 4:31, Empennage 56:39, Total 70:35)
Rivet count: 74 (Total 970)

I'm back from the dead!! Over a month off has been more than enough. I was expecting it, but it still sucks.

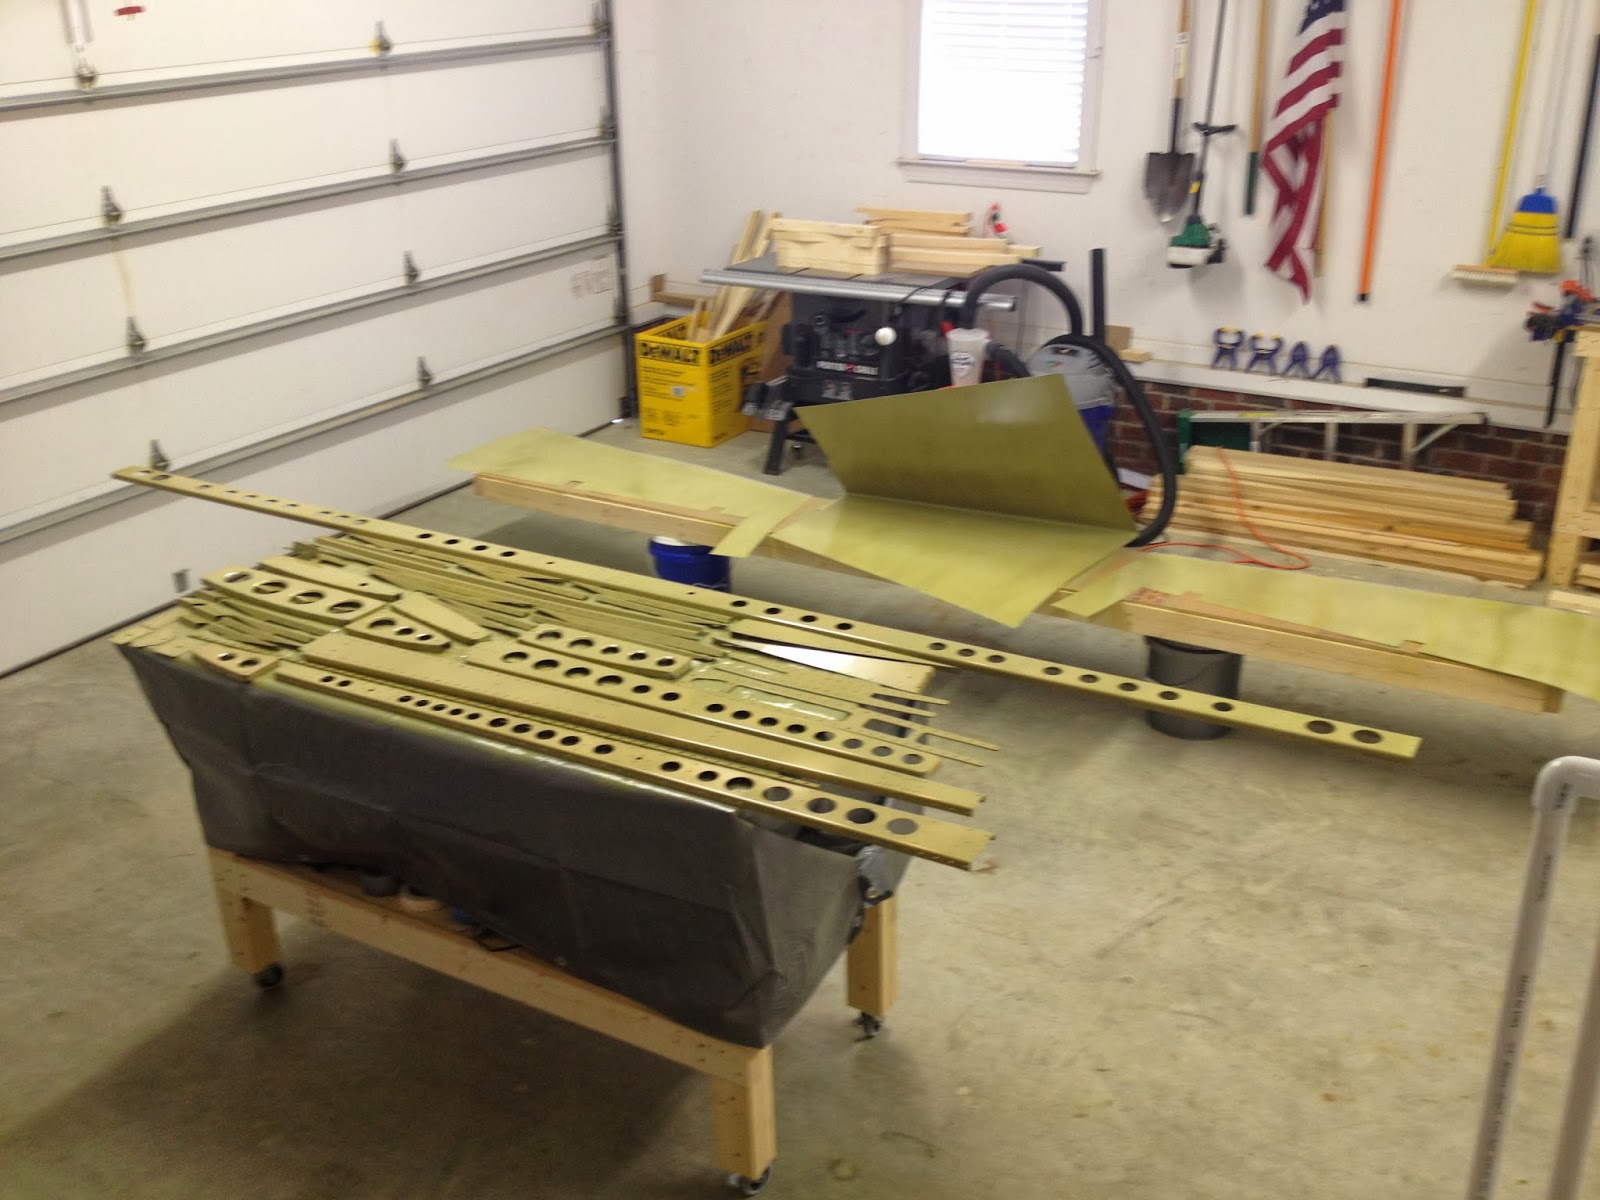
I riveted the back spar of the H.Stab together tonight. These were the pieces that were primed way back when. -L came by towards the end and even tried at riveting. A bit of miscommunication on my part, and we had to drill it out, but we got it done right the second time around. Hope she's ready for the extensive two-person riveting that will be a part of tail-cone and fuselage... I can now start working on the H.Stab full-time. Over the Christmas break, I looked ahead in the plans for the H.Stab and Elevators, and the next few months will be interesting to say the least!

HAPPY NEW YEARS!!

-M


Wednesday, November 27, 2013

1024- Rudder- p.7-11 step 1-6 & p.7-12 step 1-5

Rudder - 4 hrs 32 mins (Rudder 27:16, Empennage 54:49, Total 68:45)
Rivet count: 104 (Total 896)

Part 2 for the night. After dinner, I went on a rampage of work. I really didn't intend to work this long, but then again I did want to finish up. At 2:30 in the morning, I was all done, and am posting this a day later.

I started off by riveting the trailing edge of the rudder. Double flush rivets are definitely not my strong point. There are all kinds of dents and marks, but since I am not polishing the plane, they will all be filled and painted over, so I really don't mind. It will likely be the same for the elevators when I do them. Unfortunately, I bought aluminum angle instead of angle iron or steel, so it is all bent and deformed and can't be used again.

Then came the fun task of bending the leading edges. I really hated that, and I am not looking forward to doing the elevators. It took a few attempts to get the two skins to match up and making the bent edge smooth against the bottom edge. 

Last, was attaching the counterbalance weight and bending the metal at an angle to fit snug. At over an hour to get three holes to match up, it took entirely way too long. Twelve little rivets later, the rudder was complete! -M

HAPPY THANKSGIVING!!


1023- Rudder- p.7-10 step 1-7

Rudder - 2 hrs 2 mins (Rudder 22:44, Empennage 50:17, Total 64:13)
Rivet count: 163 (Total 792)

First day working on the plane in the last 6. Unfortunately, it's going to get worse before it gets better. This past weekend was event filled, to include turning my girlfriend into my fiancee! Needless to say, there was no work done. I spent the past two nights catching up on Master's degree work from the weekend, and starting tomorrow, I am out of town for Turkey day, and then out of town on business for two weeks. The next time I build will be 16 December at the earliest.

I got home from work early today and set my sights on getting the rudder done before this long hiatus. Not only is it a major milestone, but all the build is fresh in my mind, and it saves me from having to relearn some things. In part one of the night, I worked on the spar before hunger took control. I simply needed to blind rivet the spar to the clips. On the last rivet, it didn't seat all the way. I went to drill it out, but all it did was bend the shear clip. I had to drill out all of the blind rivets to fix the clip and then start over. Not very pleased about that. After getting the spar to the clips then came time to rivet the skins to the spar. the overhang for the leading edge was too much to use the squeezer so bucking time it was. last was squeezing the counterbalance rib to the skin. Easy work (albeit frustrating at times) for the before-dinner work. -M


Thursday, November 21, 2013

1022.1- Rudder- p.7-9 step 2-8

Rudder - 1 hr 46 mins (Rudder 20:42, Empennage 48:15, Total 62:11)
Rivet count: 33 (Total 629)

-E came over tonight and helped to get the rudder trailing edge sealed, cleco'd, and blind-riveted. That was a tremendous help. You really do need two people to build this monster. No video unfortunately, but there is a picture. I figured out early that I ordered the 3.5 oz from Van's instead of the 1oz. Quick cost analysis was that it was easier to use the tube and waste some than to wait around for new one and far better than overnight shipping cost. Positive news despite the waste is that I learned to use the tube early for repeat use on elevators in a few months. 

I went to rivet the bottom spar and was perplexed about how to buck the narrow parts, only to discover I had a tool (squeezer set borrowed from -B) that I had been ignoring. The other night I "butchered" one side of the rudder, and today the other side went like cake. Go figure. At least that is one lesson learned early for later use. Squeezing rivets is far easier than bucking. 

Tomorrow I'll work ahead on the H.Stab since the rudder needs to sit until Saturday at least. I'm finally in town for a weekend, but with an excessive amount of chores mounting, I may not get a lot done even with the extra time. As much as I enjoy building, the outside of the house is starting to slum up, and that needs immediate attention. -L, hope you're ready for yardwork. Maybe a bonfire is in order with the cold weather too. -M


Wednesday, November 20, 2013

1022- Rudder- p.7-8 step 1-3 & p.7-9 step 1

Workshop - 30 mins (Workshop 13:56)
Rudder - 1 hr 24 mins (Rudder 18:56, Empennage 46:29, Total 60:25)
Rivet count: 48 (Total 596)

Steady progress on the rudder. Attached top and bottom ribs to the skins, and then the shear clips to the stiffeners. First blind rivets of the project today.

Also spent a little time getting the angle ready for the back riveting of the rudder this weekend. Tomorrow, I will hopefully dive into the proseal goo and get the trailing edge done. That will rest all day Friday to hopefully get the rudder done between Saturday and Sunday. -M


Tuesday, November 19, 2013

1021- Rudder- p.7-7 step 1-5

Rudder - 1 hr 28 mins (Rudder 17:32, Empennage 45:05, Total 58:31)
Rivet count: 157 (Total 548)

Very productive night! Started riveting of the rudder, first by putting together the lower rib and rudder horn, then putting together the rudder spar and reinforcement plates. All assemblies required a platenut to be attached and I think I checked and verified the orientation of them about 17 times each. I was really paranoid about making a mistake there. It all worked out.

Then I back riveted all the stiffeners to the skins. It turns out as I suspected, that back riveting is not only really easy, but also very fun. Not to mention it is about 3 times more time efficient than bucking. I did the second skin, 63 rivets, in about 20 minutes. Tomorrow night should be a relatively short night of normal bucking, and then Thursday night may be time to bust out the tank sealant for the trailing edge assembly. -M


Friday, November 15, 2013

1020- V.Stab- p.6-6 step 8-9

Vertical Stabilizer - 33 mins (V.S. 22:11, Empennage 43:37, Total 57:03)
Rivet count: 66 (Total 391)


Short video tonight, but the Vert Stab is complete!! Rudder riveting starts on Monday.... -M


Thursday, November 14, 2013

1019- V.Stab- p.6-6 step 5-8

Vertical Stabilizer - 2 hr 3 mins (V.S. 21:38, Empennage 43:04, Total 56:30)
Rivet count: 154 (Total 325)

Holy rivets Batman. This is just the V.Stab... 300 down ~13,000+ to go... 

Nearly complete. So close. -M


Wednesday, November 13, 2013

1018- V.Stab- p.6-5 step 3 & p.6-6 step 1-5

Vertical Stabilizer - 2 hr 15 mins (V.S. 19:35, Empennage 41:01, Total 54:27)
Rivet count: 81 (Total 171)

All-out riveting tonight. Unfortunately, not as productive as last night with pieces close together. Working with a larger piece, it was one rivet at a time, and having to blindly reach in many times. I can see how a rivet-buddy in the future will come in handy. (I hope you're ready, -L!)

I assembled the skeleton and then cleco'd the skin on. Riveted the middle inspar rib, about half of the front spar, and all the nose ribs to the skin. I expect about two more hours of work on the VS tomorrow and then I'll be complete with chapter 6 of the plans. Adios and goodnight. -M


Tuesday, November 12, 2013

1017- V.Stab- p.6-4 step 7 & p.6-5 step 1-2

Vertical Stabilizer - 1 hr 59 mins (V.S. 17:20, Empennage 38:46, Total 52:12)
Rivet count: 84 (Total 90)

Assembled the rear spar pieces, and then attached the doublers to the rear and front spars. The riveting was slow at first as I was taking my time, but it sped up significantly as the night went on. I'll need to stay focused so I don't repeat the same mistakes from the practice kit due to going fast. 

Glad to see progress being made, and tomorrow the pieces will start taking on a shape!

I figured out that in my first month (four weeks), I worked ~37 hrs. This was a low number from my desired pacing, but I'm satisfied, given I didn't have a single weekend to utilize for long hours. Overall I'm happy with the progress, but I know that heading into Nov and Dec, the holidays and work travel are going to seriously hamper progress (I'll be out of town a total of three weeks in December alone!) I'll make up for it in 2014... -M


Friday, November 8, 2013

1016.5- V.Stab- p.6-4 step 6

Vertical Stabilizer - 20 mins (V.S. 15:21, Empennage 36:47, Total 50:13)
Rivet count: 6

The first rivets have been set!

I got home from work and noticed the primer had dried nicely. A few notes: 
The garage still reeked-- I'm spraying outside only from now on.
The smell is nauseating-- That filter I bought and used earlier is awesome. (HF special)
There was a thin coating of primer in dust form on the floor and I had to clean that up too-- ditto.
The use of a screen door to hold drying pieces works far better than a solid surface-- Thrift shop!

I also clecod the VS spar together and taped off holes that won't get a rivet. For now, the project goes on hold for the 3-day weekend. Thank a veteran this weekend... -M


Thursday, November 7, 2013

1016.3- V.Stab p.6-4.5, Rudder p.7-6.13, H.Stab p.8-2.4 Part 2

Vertical Stabilizer - 1 hr (V.S. 15:01)
Rudder - 1 hr (Rudder 16:04)
Horizontal Stabilizer - 15 mins (H.S. 2:41, Empennage 36:27, Total 49:53)

I've eclipsed the two day mark. 7 minutes short of 50 hrs, which for a nominal 2,500 hour build means I'm 2% complete! (I'm sure it will be less in the long run, but time will tell)

I was going to prime last night, but I ran into a few logistical issues with setting up the HVLP gun. I primed this morning instead and I'm glad I did. I originally mixed up two cups of primer for the batch, and that got me about half way through the parts. A second batch of primer was necessary. 

The first thing I primed was one of the skins and I made it "orange peel." I was using way too much primer. I adjusted it a little better, and did the rest of the project but as look back on it now, I still used way too much primer. I need to figure out a better way to evenly distribute the paint. I'll keep searching the forums.

In the mean time, it's a trip to the Outer Banks for the holiday weekend, so the riveting will begin in earnest next week. Maybe I'll sneak in a rivet or two tomorrow just because. I started the build with 30 mins of work the day before a trip, and here will be 28 days later before a trip. It's only fair! -M


Tuesday, November 5, 2013

1016.1- V.Stab p.6-4.5, Rudder p.7-6.13, H.Stab p.8-2.4

Workshop- 30 min (Workshop 13:26)
Vertical Stabilizer - 1 hr 30 mins (V.S. 14:01)
Rudder - 1 hrs 30 mins (Rudder 15:04)
Horizontal Stabilizer - 30 mins (H.S. 2:26, Empennage 34:12, Total 47:38)

I built a long dunk tank for the HS spar out of 12 ft. 2x4 and spare pieces and ply from the crate from Van's. Glad that is done!

Massive night of work with alumiprep and alodine. All the pieces that were sitting around are complete. Part of me is glad I did everything at once to save on the set-up and clean up (about 45 min total), but wow is it tiring...

Either way, the parts came out really nice.... Priming tomorrow! -M


Monday, November 4, 2013

1016- H.Stab- p.8-2 step 1-4

Workshop- 36 min (Workshop 12:56)
Horizontal Stabilizer - 1 hrs 56 mins (H.S. 1:56, Empennage 30:42, Total 43:38)

So I thought I was going to have time this weekend to do some priming, but I was out of town. Same goes for next weekend. Mid-week it will be. Tonight I started the Horizontal Stab. Cleco the rear spar and doubler together and match-drill and countersink. Also match drill the 8 hinge brackets to the spar. Deburr, Scuff, and set aside. First batch of the H.S. is ready for priming.

I finally got around to set up my drying rack: Simple construction out of PVC pipe, L's, and T's. I also got some 16 gauge wire and tested the concept by hanging the pieces of the V.Stab on one of the racks. Even was able to hang some pieces off other pieces. Success. For long pieces like the H.S. spars, I'll have to hang one end off each rack.

Tomorrow will consist of making the dunk tank for the H.S. and hopefully start the alodine process on  as many pieces as I can. You can see the dip tanks and distilled water hanging out in the back of the last few videos. -M


Thursday, October 31, 2013

1015- Rudder- p.7-6 step 11-12

Rudder - 1 hrs 58 mins (Rudder 13:34, Empennage 28:46, Total 41:06)

Dimpled all the rudder skeleton pieces. Almost forgot to scuff, but caught myself after two pieces. After everything was scuffed and dimpled, the next step calls to countersink the trailing edge. The wedge proved troublesome. I needed to make it parallel to the drill, so I clecod the other wedge to the back. Upon attempting to drill with the press, found out the the nub on the bit wouldn't go clean through. The match drilling calls to be perpendicular to the chordline, so the angle was now off by 6 degrees. What a pain. Researched a little online and went with the technique of using the deburring bit without a nub. I had to be extra careful using the countersink cage to make sure I was centered on the holes. Guess I'll find out when it's time to start riveting whether this worked or if I'll be ordering a new piece. Rudder is now ready for priming.

I looked ahead at the Horizontal Stab section and found out it calls for priming in batches. I plan to work ahead and get the next two pieces on the HS assembled so I can prime them along with the Vert Stab and Rudder. -M


Wednesday, October 30, 2013

1014- Rudder- p.7-6 step 10-11

Workshop- 33 mins (Workshop 12:20)
Rudder - 1 hrs 37 mins (Rudder 11:36, Empennage 26:48, Total 39:08)

Spent the first part of the night making a platform for the C-frame dimpler to help hold the larger skins. It worked out great!

Finished up deburring the skins and then dimpled them. It was a simple, albeit painfully repetitive, night. -M


Tuesday, October 29, 2013

1013- Rudder- p.7-6 step 6-10

Rudder - 2 hrs 33 mins (Rudder 9:59, Empennage 25:11, Total 36:58)

I got my answer from Van's this afternoon and was able to work on the rudder again after 4 days of not. Match drilled the skins and then disassembled the whole thing for deburring. Tonight was one of those nights that after 2 hours of work it feels like nothing was done. However, in the grand scheme each minute adds up. I crossed the 25 hour mark tonight! On a nominal 2500 hour build for the project, I can now say I am 1% complete!

I still need to deburr the holes on the skin tomorrow, and then I can start scuffing and dimpling the skins and ribs. With the rudder nearly complete, this weekend is looking like an excellent time to break out the alodine and primer. I'll have to get -L to help!! This also means the first rivets should go on next week! -M


Thursday, October 24, 2013

1012- Rudder- p.7-6 step 3-5

Rudder - 2 hrs 4 mins (Rudder 7:26, Empennage 22:38, Total 34:25)

First things first. PPL is complete! I'm one step closer to being able to fly this beast one day. Only managed about 7 hours of RV work this week with the extra studying, and I'm gone for the weekend, so it will be time to turn things up a notch next week.

Today was a boring day. I'm starting to get into a rhythm when it comes to the repetitive clecoing, and also noticed the same previously for steps with drilling and deburring. It's a strange meditative process. Won't go so far as to say it's therapeutic, but definitely something to it. I'm sure it will come in handy for the large pieces like the wings and fuselage skins.

Started by peeling vinyl from skins. I spent way too much time with the ruler and gave up halfway and just winged it. No sense wasting time anymore in the future. Deburred edges on skin, then attached them to the skeleton along with the trailing edge after cutting it. The skin was not clecoing to the rudder horn for some reason, and I found out that one of the clecos holding the bottom rib together was attached in a way that it was interfering. Easy fix. There is still another area where the clearance isn't quite right, so I will have to email Van's about it. I'm guessing the answer will be to file down the edge of the hole in the skin that the rudder horn sticks out from.... -M


Wednesday, October 23, 2013

1011- Rudder- p.7-4 step 5, p.7-5 & p.7-6 step 1-2

Rudder - 1 hr 4 mins (Rudder 5:22, Empennage 20:34, Total 32:21)

Light work today. A lot of easy steps. Countersink the striker plates that were assembled yesterday. I really need to invest in another countersink cage so that I can keep the #30 in one permanently. The adjustments are taking their toll. I also got tired of picking up the large plastic bin to sweep the aluminum shavings into, so I made a scoop out of half an old detergent bottle. It works much better.

Next step was to assemble the stiffeners and shear clips, and I screwed up by initially putting the shear clips upside down. I didn't notice until after match drilling. Thanks to modern technology and the symmetry of Van's pre-punched holes, it was an easy fix. Crisis averted. I attached these to the spar followed by two reinforcement plates. Then assembled the top rib and attached it and the counterbalance rib to the spar. Really easy work all around.

I'm stopping early tonight in order to study up for my FAA PPL checkride tomorrow morning. I'll hopefully be celebrating success tomorrow with assembly of the rudder skins! -M


Tuesday, October 22, 2013

1010- Rudder- p.7-2 &7-3 deburr & p.7-4 step 1-5

Rudder - 2 hrs 52 mins (Rudder 4:18, Empennage 19:30, Total 31:17)

I deburred all the pieces that were cut yesterday in addition to the rest of the rudder pieces not to include the skins. That was boring yet very necessary.

Afterwards, began rudder assembly with the bottom rib, horn, spar, and plates. Drilling and clecos. A simple yet time consuming night. Not much else to report. -M


Monday, October 21, 2013

1009- Rudder- p.7-2 & p.7-3 Cutting

Rudder - 1 hrs 26 mins (Rudder 1:26, Empennage 16:38, Total 28:25)

I decided to skip ahead to the Rudder and hold off on priming parts until a larger batch is ready to go. So I'll be working on this and perhaps even more sections for a few weeks before moving on to priming during a weekend when I have a lot of time available.

Today I removed the vinyl off all rudder parts and then measured and cut all pieces as needed. Tomorrow will be a long evening of deburring edges on all parts of the rudder. It's bedtime for now with work starting early tomorrow. -M


Friday, October 18, 2013

1008- V.Stab- p.6-3 step 8-11 & p.6-4 step 1-4

Vertical Stabilizer - 1 hrs 30 mins (V.S. 12:31, Empennage 15:12, Total 1:02:59)

Final assembly of the front spar doubler and countersinking. Dimple and c'sink the rear spar. I totally messed this up. I was 3/4 done and realized I had the die set for for a 3-X rivet and not for a #40 dimple. Luckily it was underset and an easy fix. Miscellaneous drilling of holes and deburring all around. Finally, the rudder stop attachment. I need to swing by the hardware store for some PVC to make a drying stand and then its time for priming tomorrow! -M


1007- V.Stab- p.6-3 step 6-7

Vertical Stabilizer - 2 hrs 25 mins (V.S. 11:01, Empennage 13:42, Total 25:29)

Scuff and dimple the VS skin. Got to try the C-frame dimpler, squeezer set, and pop rivet set. My forearms are on fire. For the C-frame, I also fabricated a platform out of spare wood from the empennage crate and a 2x4 scrap to hold a piece up at the same level as the dimple die. It's going to come in really handy during the build.

Disassembled the skeleton to deburr and dimple. Forgot to scuff two of the pieces before dimpling, but corrected myself. Dinner time, I'll be back for round two later tonight... -M


Thursday, October 17, 2013

1006- V.Stab- p.6-3 step 4-5

Vertical Stabilizer - 1 hrs 17 mins (V.S. 8:36, Empennage 11:17, Total 23:04)

Simple and straightforward. Drill holes in the VS skin, swap clecos, drill the other half of the holes.

Remove skin and deburr everything. Also mark some holes that won't be dimpled later on. I'll do the dimpling tomorrow. -M


Wednesday, October 16, 2013

1005- V.Stab- p.6-2 step 4-6 & p.6-3 step 1-3

Vertical Stabilizer - 4 hrs 31 mins (V.S. 7:19, Empennage 10:00, Total 21:47)

Well, I got a bit carried away tonight and lost track of time. Even got ahead of the plans and did some deburring ahead of time. A lot was accomplished and the reward of an aircraft-looking piece to show for it!

Started off by finishing the assembly of the VS rear spar and match drilling it. Disassembly followed and it was time for countersinking. I had a spare spar from someone at the airport that screwed up their assembly and was able to fine tune the depth with it. This step was really frustrating and I now see why people invest in multiple countersink cages to be spared from having to do that step repeatedly.

After deburring, I reassembled the spar, and then deburred all the other parts of the VS in preparation for putting the skeleton together. I got the skin ready for attachment and this is when things got fun. I had forgotten to file down the ends of the nose rib pieces so they wouldn't dent the skin ($90 to reorder), so I took everything apart to get to the pieces. In the process of catching an error, I committed another by putting the pieces back together with the front spar facing the wrong way. I didn't notice until after putting everything together and instead of starting over I undid the skeleton with the nose ribs still attached to the skin. It was a pain, but I got it done without any damage. Finished clecoing and now I have a complete VS. -M


Tuesday, October 15, 2013

1004- V.Stab- p.6-2 step 2-3

Vertical Stabilizer - 1 hr 58 mins (V.S. 2:48, Empennage 5:29, Total 17:16)

Good progress tonight! Even though it took 2 hrs to attach 3 pieces, it was 148 holes drilled and 592 holes deburred. There is no way I will keep track of minutia like this as we go on, but it is a good perspective to look back in few years and see that this whole endeavor started with a simple task repeated ad nauseam. 
Lesson learned- deburring sucks. The deburr bit attached to the drill makes life a bit easier at least. It is a real pain to have to clean up the shavings as often by hand. Aluminum sticks to the tabletop brush too readily. The shop vac is too powerful and I'd be afraid of ingesting bits, clecos, or actual pieces. I need to invest in a handheld vacuum for the shop...
Tonight I attached the spar caps that were previously fabricated to the VS spar, then match drilled the three together along the web, and then along the flanges. Simple. Straightforward. -M


Thursday, October 10, 2013

1003.5- Vertical Stab- p.6-2 Step 1

Vertical Stabilizer - 50 mins (V.S. 0:50, Empennage 3:31, Total 15:18)

Well, I'm officially an RV-10 builder! It's been rough holding myself back the last few days waiting for tonight. The fact that I busted my finger on Tuesday working on a wooden porch glider helped. See pic below, the swelling has subsided quite well. The 10th day of the 10th month to start the RV-10!!... 

Fabricated the V.S. spar caps by cutting the angles per the plans and then deburred all edges on them. Already learning a few tricks, too. The scotch brite wheel is going to get used up fast unless I make sure to make a few passes with the edge deburring tool first. Three firm passes seems to do the trick. Followed by two quick passes on each "corner edge" with the wheel. Also developing a habit that is working well for the actual corners of the stock pieces. I wonder if I'll be this detail oriented in a month's time?

Now I get to put the project on hold again. Going to visit -L's family in PA for the long weekend. More to follow on Tuesday. Cheers! -M


Tuesday, October 1, 2013

1003.3- Practice Toolbox

Between yesterday and today, I spent about five hours getting the practice toolbox together. I continue to make mistakes, which I consider to be a good thing while it is on pieces that don't matter. Tonight, I let the bucking bar slip twice and made pretty ugly dents. I was probably trying to go too fast. This is something I definitely need to consider as erring on rivet #82 of a skin would require ordering the whole section again, as I do not see myself drilling out 81 rivets at once.


Sunday, September 29, 2013

1003.1- Empennage Inventory Second Half

Empennage- 1 hr 30 mins (Empennage 2:41, Total 14:28)

After going to the airport and watching -L and her mom get a ride in -E's RV-8, I counted and inventoried all the hardware. I'm missing two washers so I'll have to give Vans a call tomorrow. Then I moved the oversized pieces into the guest bedroom since I don't want to risk them getting damage in the garage. Finally ready to build!! -M


1003- Empennage Inventory First Half

Empennage- 1 hr 11 mins (Empennage 1:11, Total 12:58)

Spent a quick hour taking everything out of the crate and running inventory. The crate was really beat up during shipping, but I'll still be able to scrap most of it for a C-frame dimpler platform and alodine dunk tank. Glad to have that giant thing not taking up garage floor anymore. -L and her mom were in town and helped me out! -M


Friday, September 27, 2013

1002.5- Workshop Ready


Workshop- 3 hrs (Workshop 11:47, Total 11:47)

Between last night and today I got my shop set up and ready to go. No video as it was moving things out of garage and rearranging them again. Pretty boring but necessary step. Next post should be vid of the practice kits (only took two months...). I hope this isn't a preview of things to come with respect to progress. -M